How to Arrange Tulips Like a Pro

Tulips are one of the most versatile and rewarding flowers you can arrange at home. As growers and arrangers here at Tulip & Peony Co., we work with hundreds of tulips every single week throughout the growing season, and we have learned that these blooms are unlike anything else in the flower world. Where roses hold a fixed shape and lilies open predictably, tulips are dynamic. They continue to grow in the vase, sometimes adding an inch or more in height. They curve toward light, twist gently, and open wider as the days pass. Every arrangement you make with tulips will look subtly different each morning, and that is part of what makes them so captivating.
Whether you are working with a handful of stems from the garden or a full bunch from our shop, the techniques in this guide will help you create arrangements that look polished, professional, and effortlessly beautiful. You do not need years of training or expensive tools. You just need good stems, a few simple principles, and a willingness to let the tulips do what they do best.
Choosing the Right Vase
The vase you choose has a bigger impact on your arrangement than you might think. It provides the structural support your tulips need, sets the visual tone of the display, and directly influences how long your flowers last. Getting the vase right is the first step to a professional-looking arrangement.
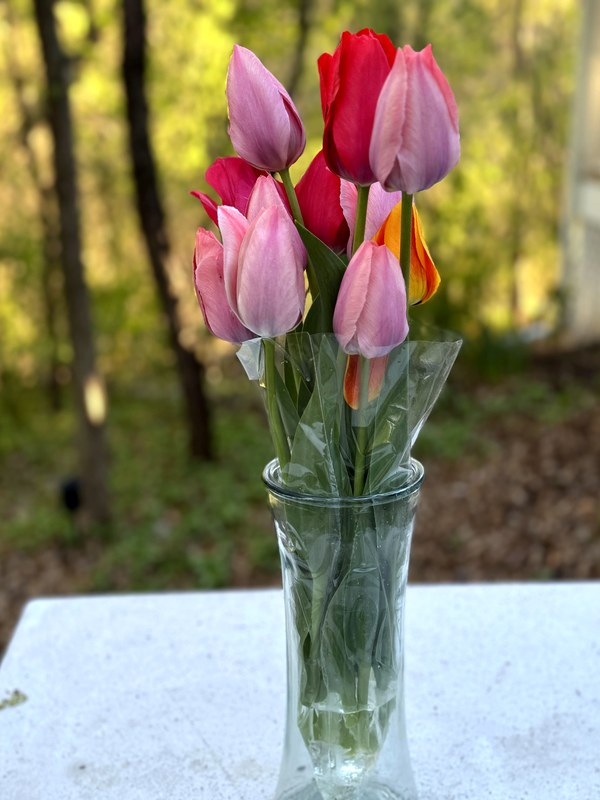
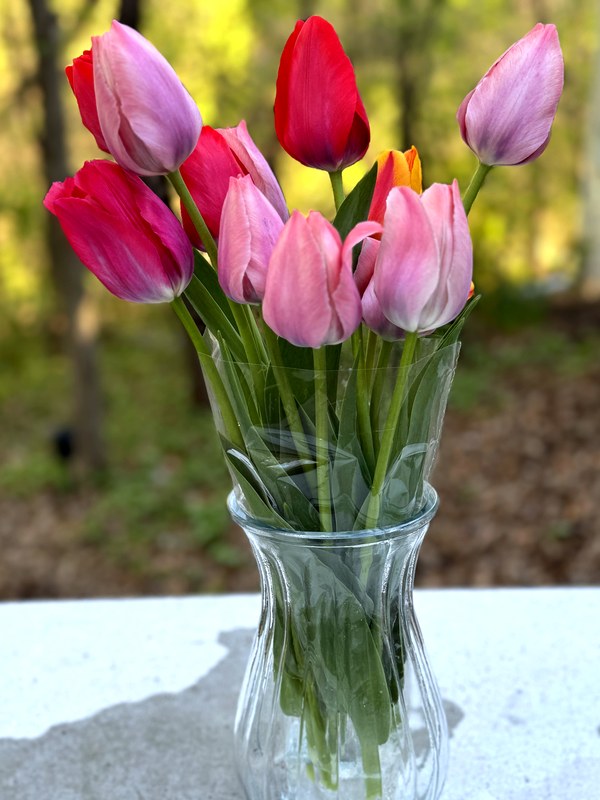
Tall, narrow vases work beautifully with tulips because they keep the stems gathered and upright. A cylinder vase or a slim trumpet shape gives tulips that classic, elegant look you see in high-end floral shops. The narrow opening prevents stems from splaying outward, which means even a modest bunch of fifteen stems can look full and intentional. If you love the look of tulip stems, which are smooth, green, and sculptural in their own right, a clear glass vase is the perfect choice. The transparency turns the stems into part of the design, especially when they start to curve and cross naturally over the first few days.
Wide-mouth vases and bowls create a completely different feel. They allow tulips to fan out and drape naturally over the edges, producing a loose, organic arrangement that looks stunning on a kitchen table or sideboard. Ceramic vases in matte finishes bring a cozy, cottage-garden quality to the display. Stoneware in earth tones pairs especially well with warm-colored tulips like peach, apricot, and burgundy.
As a general rule, your vase should be about one-third to one-half the total height of your tulips from the water line to the tip of the tallest bloom. A vase that is too short will not support the stems properly, and they will flop over the edges. A vase that is too tall will hide the flowers and make the arrangement feel top-heavy. When in doubt, err on the slightly shorter side and let the tulips rise gracefully above the rim.
Preparing Your Stems
Proper stem preparation is the foundation of any good arrangement, and it takes only a few minutes. Start by removing all the lower leaves, specifically any foliage that would sit below the water line in your vase. Submerged leaves decompose quickly and breed bacteria, which clouds the water and shortens the life of your flowers. Most tulips have two to four leaves, and you will typically remove the bottom one or two, leaving the upper leaves intact for their visual contribution to the arrangement.
Next, trim the stems. Using sharp scissors or a clean floral knife, cut one to two inches off the bottom of each stem at a 45-degree angle. The angled cut is important for two reasons. First, it increases the surface area available for water absorption, which helps the tulips drink more efficiently. Second, it prevents the stem from sitting flush against the bottom of the vase, which can seal off the cut end and block water intake entirely.
The sharpness of your cutting tool matters more than you might expect. Dull scissors crush and compress the delicate stem fibers rather than cutting cleanly through them. Crushed fibers cannot transport water effectively, and the damaged tissue becomes a breeding ground for bacteria. If you do not have sharp floral scissors, a clean kitchen knife works well. Just make sure to cut on a cutting board rather than pressing the stem against a hard surface.
Fill your vase with cool, fresh water. Unlike many cut flowers that prefer lukewarm water, tulips thrive in cool or even cold water. The cooler temperature slows their metabolism, which keeps them firmer and more upright for longer. If it is a particularly warm day, adding a few ice cubes to the water is a trick that professional florists use regularly.
The Spiral Technique
The spiral technique is the single most useful method in any florist's toolkit, and it is the one we use most often in our studio. Once you learn it, you will use it for tulips, for mixed bouquets, and for just about any hand-tied arrangement you create.
Start by holding one stem vertically in your non-dominant hand. This is your anchor stem. Pick up a second stem and place it at a slight angle, crossing over the first stem about two-thirds of the way down. Now add a third stem, again at a slight angle, always placing it in the same rotational direction, either clockwise or counterclockwise. As you continue adding stems, each one crosses over the previous at the same point, creating a spiral pattern where the stems fan out at the top and cross in the middle.
The key is consistency. Always add stems in the same direction and at roughly the same angle. Do not grip the bundle too tightly. You want enough tension to hold the shape, but the stems need room to settle naturally. After every five or six stems, give the bouquet a gentle turn in your hand to check the shape from all sides. You are looking for an even, rounded dome of blooms at the top with a balanced distribution of color and height.
This technique works especially well with twenty-five to fifty stems. Our Grand Bunch of fifty stems is ideal for practicing the spiral, as it gives you enough material to create a full, satisfying shape without being overwhelming. With one hundred stems, the spiral creates a truly dramatic, lush arrangement that commands attention in any room.
Need stems to practice with? Our Grand Bunch (50 stems, $70) is the perfect size for a full arrangement. Ships fresh from our farm.
Shop TulipsThe Grid Technique
If the spiral method feels intimidating, or if you are working with a wide-mouth vase or bowl, the grid technique is an excellent alternative that delivers beautiful results with minimal fuss. It is especially popular with beginners because it provides built-in structure that keeps every stem exactly where you want it.
To create a grid, stretch strips of clear floral tape across the mouth of your vase in a crosshatch pattern, creating a grid of squares roughly one inch wide. Press the tape firmly against the rim so it adheres well and can support the weight of the stems. If you do not have floral tape, regular clear tape works in a pinch, though it may not hold as securely on damp or glossy surfaces.
Once your grid is in place, simply insert one or two stems into each square. The tape holds the stems upright and evenly spaced, preventing them from bunching together in the center or flopping over the edges. You can fill every square for a dense, full arrangement, or leave some empty for a more airy, modern look. The grid also makes it easy to mix colors intentionally, placing complementary shades next to each other or creating patterns across the arrangement.
This technique is particularly effective for centerpieces on dining tables, where you want a low, wide arrangement that does not block sight lines across the table. Use a shallow bowl, create your grid, and cut the tulip stems shorter than you normally would. The result is a lush, pillow-like display of blooms that sits at eye level when your guests are seated.
Color Pairing Ideas
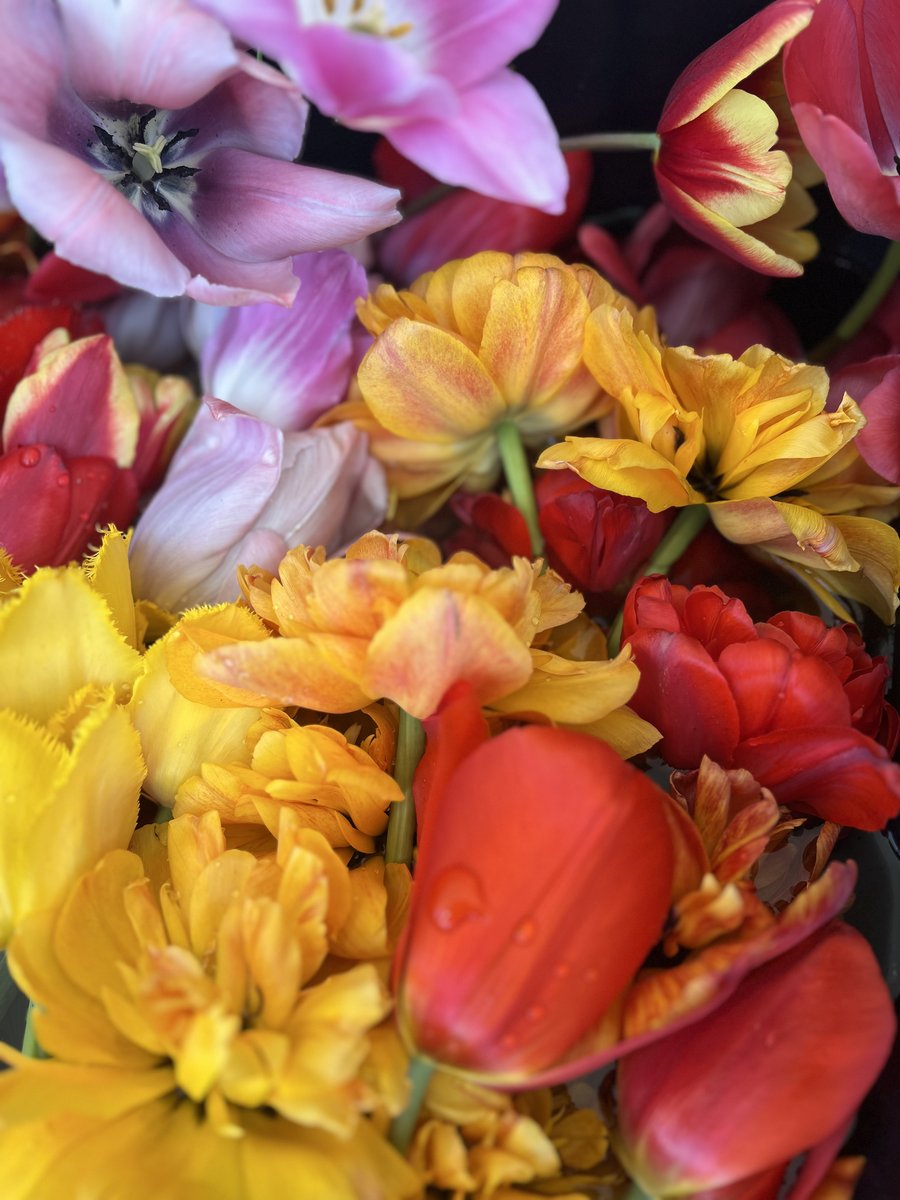
Color is where tulip arranging gets truly exciting. With dozens of varieties available in nearly every shade imaginable, the combinations are endless. Here are four approaches that consistently produce stunning results.
Monochromatic arrangements use a single color in varying shades and intensities. An all-pink arrangement, for example, might combine pale blush tulips with medium rose and deep magenta. The tonal variation creates depth and sophistication while maintaining a cohesive, elegant feel. Monochromatic arrangements are the easiest to get right and always look polished.
Complementary pairings use colors from opposite sides of the color wheel. Purple and yellow is a classic combination that creates vibrant contrast and energy. Deep plum tulips mixed with bright lemon-yellow stems produce a display that is impossible to ignore. This approach works best when you let one color dominate and use the other as an accent, roughly a two-to-one ratio.
Analogous groupings combine colors that sit next to each other on the color wheel. Red, orange, and pink create a warm, fiery display that feels like a sunset. Purple, blue, and lavender produce a cool, calming arrangement that works beautifully in bedrooms and bathrooms. Analogous palettes feel natural and harmonious because the colors share underlying tones.
All-white arrangements deserve their own mention. White tulips are timeless, refined, and versatile enough for any setting, from a formal dinner party to a casual weekday breakfast table. They pair with every vase material and every interior style. If you are unsure about color, white is always the right choice.
Styling Your Arrangement for Different Spaces
The size of your bunch and the style of your arrangement should match the space where it will live. Different rooms call for different approaches, and choosing the right scale makes all the difference between an arrangement that enhances a room and one that overwhelms it or gets lost.
For a kitchen table centerpiece, a medium arrangement of twenty-five to fifty stems works perfectly. Keep it low enough that people can see each other across the table, and choose colors that complement your dishware or table linens. Our Grand Bunch of fifty stems is sized exactly for this purpose.
An entryway or console table is where you can go big and dramatic. This is the first thing guests see when they walk in, so make it count. A tall vase with fifty to one hundred stems creates an immediate impression. Our Statement Bunch of one hundred stems fills a large vase beautifully and makes a genuine statement.
For nightstands and bathroom vanities, think small and intimate. A single tulip in a bud vase is one of the most elegant things you can place on a nightstand. Three to five stems in a small jar or bottle work beautifully on a bathroom counter. Our Classic Bunch of twenty-five stems can be split into three to five small arrangements, giving you flowers for multiple rooms throughout the house.
A home office desk benefits from a small, cheerful arrangement that brightens your workspace without taking up too much room. Five to seven stems in a short vase placed to one side of your monitor can make a long workday feel significantly more pleasant.
Pro Tip: Tulips continue to grow in the vase and will naturally bend toward light. Rotate your arrangement daily for even growth, or embrace the graceful curves — they are part of what makes tulips so special.
Keeping Your Arrangement Fresh
A beautiful arrangement deserves to last as long as possible, and with proper care, your tulips can stay vibrant for seven to ten days. The most important thing you can do is change the water daily. Fresh, cool water keeps bacteria levels low and ensures the stems can continue to drink efficiently. Each time you change the water, give the vase a quick rinse to remove any slime or residue that has built up on the inside.
Every two to three days, pull the tulips out of the vase and re-trim the stems, cutting another half inch off at a 45-degree angle. This opens up fresh tissue that can absorb water more readily. You will notice that the cut ends darken and seal over time, which is the plant's natural wound response but also reduces water uptake.
Keep your arrangement in a cool spot, away from direct sunlight, heating vents, and radiators. Heat accelerates the opening and aging process, causing the blooms to open wide and drop their petals sooner. Also keep tulips away from fruit bowls. Ripening fruit, particularly bananas and apples, releases ethylene gas, which is a natural hormone that speeds up wilting in cut flowers.
Adding a small drop of household bleach to the water or using the flower food packet that came with your bouquet helps inhibit bacterial growth. Either option works well. The goal is simply to keep the water as clean and clear as possible throughout the life of the arrangement.
For a deeper dive into keeping your cut tulips fresh and thriving, check out our complete guide to caring for cut tulips, which covers everything from the penny trick to reviving drooping stems.
Mixing Tulips with Other Flowers
While tulips are stunning on their own, they also play well with other spring blooms if you want to create a mixed arrangement. The key is choosing companions that complement rather than compete with the tulips' sculptural form.
Ranunculus are one of the best partners for tulips. Their ruffled, layered petals contrast beautifully with the tulip's smooth, clean lines, and they come in a similar range of spring colors. The two flowers have comparable vase lives, so they age gracefully together.
Hyacinths add fragrance and a different texture to tulip arrangements. Their dense clusters of small florets create visual weight at the base of the arrangement, while the tulips rise above on their long, clean stems. The combination of scents is intoxicating in the best way.
Daffodils are a classic spring pairing, but they require a word of caution. Freshly cut daffodils release a sap called mucilage that is toxic to other cut flowers and will cause tulips to wilt prematurely. If you want to combine tulips and daffodils, condition the daffodils separately in their own vase of water for at least twelve hours first. Once the sap has stopped leaching, usually visible as a cloudy substance in the water, you can safely combine them with tulips in a fresh vase. Do not re-cut the daffodil stems after conditioning, as this will restart the sap release.
Adding greenery like eucalyptus, fern fronds, or even fresh herbs like rosemary and mint can give a tulip arrangement a lush, garden-gathered quality. Tuck the greenery around the edges and let it drape slightly over the rim of the vase for a relaxed, natural feel.
When our peony season arrives in late May and June, tulips and peonies together create one of the most breathtaking combinations in all of floristry. The peony's lush, full blooms paired with the tulip's clean geometry is a study in contrast that never fails to impress. If you grow your own peonies or catch the tail end of our tulip season overlapping with the peony harvest, this is a pairing worth trying at least once.
Arranging Is Intuitive
If there is one thing we hope you take away from this guide, it is that arranging tulips is meant to be intuitive, forgiving, and fun. Unlike more rigid flowers that demand precise placement, tulips have a way of settling into beauty on their own. You can follow every technique in this guide to the letter, or you can simply drop a handful of stems into a jar and let them do their thing. Both approaches produce gorgeous results.
Tulips reward experimentation. Try a tight, structured arrangement one week and a loose, wild one the next. Put a single stem in a bud vase on your windowsill and watch how it curves and grows over the course of a few days. Mix colors you have never combined before. Cut the stems short and float the blooms in a shallow bowl of water. There is no wrong way to enjoy these flowers.
The more you work with tulips, the more you will develop your own instincts about what looks right in your space, with your vases, in your light. And that personal touch is what transforms a simple flower arrangement from a decoration into something that truly feels like home.
Want to grow your own? Learn how to plant and grow tulips at home with our complete guide — from bulb selection to spring blooms.
Read: Growing Tulips