How to Grow Tulips at Home
Few moments in the gardening year match the excitement of seeing tulip shoots push through the cold spring soil. After months of gray skies and frozen ground, those first green spears are a promise that color and warmth are on the way. As Minnesota flower growers, we experience that thrill every single spring on our farm in Eagan, and we can tell you firsthand that growing tulips at home is one of the most rewarding things you can do in your garden.
Tulips are not difficult to grow, but they do have specific needs that set them apart from many other flowers. They require a cold winter dormancy period, well-drained soil, and proper planting depth. Get those fundamentals right, and you will be rewarded with stunning blooms year after year. This guide covers everything you need to know, from choosing your bulbs to caring for them after they flower.
Choosing Your Bulbs
The world of tulips is vast. With over 3,000 registered varieties divided into fifteen official divisions, the choices can feel overwhelming. Understanding a few key categories will help you plan a garden that delivers weeks of continuous color rather than a single burst that fades in days.
Single Early tulips are among the first to bloom, opening in mid to late April here in Minnesota. They have classic cup-shaped flowers on sturdy, relatively short stems and hold up well in spring rain and wind. They are an excellent choice for borders and containers.
Triumph tulips are the workhorses of the tulip world. They bloom in mid-spring with strong, medium-height stems and come in virtually every color imaginable. Their reliability and wide color range make them the most widely planted class of tulip worldwide, and they are one of the primary varieties we grow on our Eagan farm.
Darwin Hybrid tulips produce the largest flowers of any class on tall, robust stems. They are the tulips you picture when you think of a classic red tulip standing tall in a Dutch landscape. Darwin Hybrids are also among the best tulips for perennializing, meaning they are more likely to come back strong for several years compared to other types.
Parrot tulips are the showstoppers. Their petals are ruffled, fringed, and twisted into dramatic shapes, often streaked with contrasting colors. They bloom later in the season and look spectacular in arrangements, though their heavy heads can sometimes need support in the garden.
Fringed tulips feature delicate, crystal-like edges on their petals that catch the light beautifully. They add texture and sophistication to any planting and pair especially well with the smoother petals of Triumph or Darwin Hybrid varieties.
When purchasing bulbs, quality matters enormously. Look for bulbs that are firm, heavy for their size, and free of mold, soft spots, or visible damage. Larger bulbs generally produce larger flowers. Buy from reputable suppliers who store their bulbs properly, as poor storage can damage the embryonic flower inside the bulb before you ever put it in the ground. We recommend purchasing your bulbs in late summer or early fall, as the best varieties sell out quickly.
When to Plant
Timing is critical with tulip bulbs. They need a sustained period of cold temperatures, typically twelve to sixteen weeks below 45 degrees Fahrenheit, to trigger the biochemical processes that lead to flowering. This chill period breaks the bulb's dormancy and allows the flower embryo inside to develop fully.
In Minnesota and other Zone 4 regions, the ideal planting window runs from late September through early November. The goal is to get your bulbs in the ground after the soil temperature has dropped below 55 degrees Fahrenheit but well before the ground freezes solid. Planting too early, while the soil is still warm, can cause bulbs to sprout prematurely or develop fungal problems. Planting too late risks the bulbs not having enough time to establish roots before the deep freeze sets in.
A simple soil thermometer, available at any garden center for a few dollars, takes the guesswork out of timing. Push it four inches into the soil in the morning for three consecutive days and average the readings. Once that average is consistently below 55 degrees, it is time to plant.
Preparing Your Soil
Tulips are native to the mountainous regions of Central Asia, where they evolved in rocky, well-drained soil with dry summers and cold winters. Replicating these conditions as closely as possible is the key to success, particularly when it comes to drainage.
Waterlogged soil is the single biggest killer of tulip bulbs. Sitting in wet ground causes the bulbs to rot, especially during the long Minnesota winter and the wet spring thaw. If your garden has heavy clay soil, which is common throughout the Twin Cities metro area, you have two good options: amend the existing soil or build raised beds.
To amend clay soil, work in generous amounts of coarse sand, perlite, or fine gravel along with well-aged compost. Aim for a ratio of roughly one part amendment to two parts native soil, mixed to a depth of at least twelve inches. The compost adds organic matter and nutrients, while the sand or perlite opens up the soil structure to allow water to drain through rather than pooling around the bulbs.
Raised beds are an even better solution. A bed raised eight to twelve inches above grade gives you complete control over the soil composition. Fill it with a mix of quality garden soil, compost, and perlite, and you will have drainage that even the heaviest spring rain cannot overwhelm. We use raised beds extensively on our farm for this exact reason.
Tulips prefer a soil pH between 6.0 and 7.0, which is slightly acidic to neutral. Most Minnesota soils fall within this range naturally, but if you are unsure, an inexpensive soil test kit or a test through the University of Minnesota Extension can tell you exactly where you stand.
Planting Depth and Spacing
Proper planting depth is one of the most important factors in growing healthy tulips. The general rule is to plant bulbs six to eight inches deep, measured from the base of the bulb to the soil surface. In colder climates like ours, err toward the deeper end of that range. Deeper planting provides better insulation against extreme cold and also helps discourage squirrels, which are notoriously fond of digging up freshly planted bulbs.
Always place the bulb with the pointed end facing up. The point is where the shoot will emerge, and while a bulb planted upside down will usually right itself, it wastes energy doing so and may produce a weaker plant. The flat or slightly concave base is where the roots will grow.
Space bulbs four to six inches apart for a natural, garden look. If you want the lush, densely packed display that you see in professional plantings and botanical gardens, you can tighten the spacing to three inches apart, but keep in mind that tighter spacing means the bulbs will compete for nutrients and may need to be dug up and divided sooner.
For planting large quantities, the trench method is far more efficient than digging individual holes. Dig a flat-bottomed trench to the proper depth, arrange your bulbs along the bottom at the desired spacing, and backfill with soil. This approach is faster, gives you a more consistent planting depth, and makes it easy to create flowing patterns and drifts of color.
Watch: Planting tulip bulbs the easy way — via Garden Answer
Watering and Care
After planting, water the bed thoroughly. This initial watering serves two purposes: it settles the soil around the bulbs, eliminating air pockets, and it encourages the roots to begin growing before the ground freezes. Even though the bulb is dormant above ground, the root system is actively developing underground throughout the fall.
Once the ground freezes, apply a two to four inch layer of mulch over the planting area. Straw, shredded leaves, or pine needles all work well. The mulch acts as insulation, moderating soil temperature swings during those unpredictable Minnesota winters where a January thaw can be followed by a plunge to twenty below. Without mulch, these temperature swings can trick bulbs into sprouting too early, only to have the emerging shoots killed by a return to cold.
In spring, pull the mulch back gradually as temperatures warm and you begin to see green shoots emerging. Resume watering if spring rainfall is sparse, keeping the soil evenly moist but never waterlogged. Tulips need about one inch of water per week during their active growth and blooming period.
After They Bloom
What you do after your tulips finish flowering is just as important as how you plant them. The temptation to tidy up by cutting back the foliage is strong, but resist it. Those leaves are the engine that powers next year's bloom.
After the flowers fade, snip off the spent flower heads to prevent the plant from putting energy into seed production. Use clean, sharp scissors and cut just below the flower, leaving the stem and all the leaves intact. The leaves will continue to photosynthesize for several weeks, manufacturing sugars that are transported back down into the bulb to fuel the following year's flower.
Let the foliage die back naturally, which typically takes four to six weeks after blooming. The leaves will gradually turn yellow and then brown. Only once they are completely withered should you remove them. During this waiting period, you can interplant with annuals or perennials that will grow up and disguise the fading tulip foliage.
Feed your tulips with a balanced bulb fertilizer in early spring when the first shoots appear, and again after the flowers fade. A granular 10-10-10 or a specialty bulb fertilizer worked lightly into the soil surface and watered in will provide the nutrients the bulbs need to recharge for next year.
Can't wait for spring? Our fresh-cut tulip bunches start at $40 for 25 stems shipped fresh from our farm.
Shop TulipsPropagating Tulips
Over time, tulip bulbs naturally produce smaller bulbs called offsets or daughter bulbs around their base. These offsets can be separated and replanted to expand your tulip collection without buying new bulbs. It is a slow process but a satisfying one.
The best time to divide tulip bulbs is in early summer, after the foliage has completely died back. Carefully dig up the bulb cluster with a garden fork, working from several inches out to avoid spearing the bulbs. Shake off the loose soil and you will see the mother bulb surrounded by smaller offsets, still attached at the base.
Gently twist or snap the offsets free from the mother bulb. Discard any bulbs that are soft, damaged, or show signs of disease. Allow the separated bulbs to dry in a cool, shaded, well-ventilated spot for a day or two. Then store them in a mesh bag or open paper bag in a cool, dry location until fall planting time.
Keep in mind that offset bulbs are smaller than their parent and will need time to reach flowering size. Most offsets will take two to three years of growing before they produce a full-sized bloom. During those interim years, they may produce only leaves or a smaller, less impressive flower. Be patient. Each year, the bulb grows larger underground, storing more energy until it is ready to put on a full show.
Minnesota Tip: In Zone 4, plant tulip bulbs in mid-October for best results. If squirrels are a problem, cover beds with chicken wire after planting — remove it in early spring before shoots emerge.
Minnesota Growing Tips
Growing tulips in Minnesota comes with unique advantages and challenges. Our long, cold winters provide the extended chill period that tulips crave, which is why they tend to perform exceptionally well here compared to warmer climates where gardeners have to pre-chill bulbs in the refrigerator. But our harsh conditions also demand a few extra precautions.
Choose varieties rated for Zone 3 or Zone 4 hardiness. While most tulips can handle our winters with proper planting depth and mulching, some of the more delicate species tulips may struggle in our coldest years. Darwin Hybrids and Triumph types are the most reliable performers in our climate.
Protect your planting from the freeze-thaw cycles that are common in late winter and early spring. A thick layer of mulch is your best defense, but you can also place evergreen boughs over the bed after the holidays, recycling your Christmas tree into garden insulation.
Consider planting in locations with a slight slope or natural drainage to prevent water from pooling during the spring snowmelt. East or south-facing beds that warm up earliest in spring will give you the first blooms in your neighborhood. Avoid low spots where cold air settles and meltwater collects, as these create the worst possible conditions for tulip bulbs.
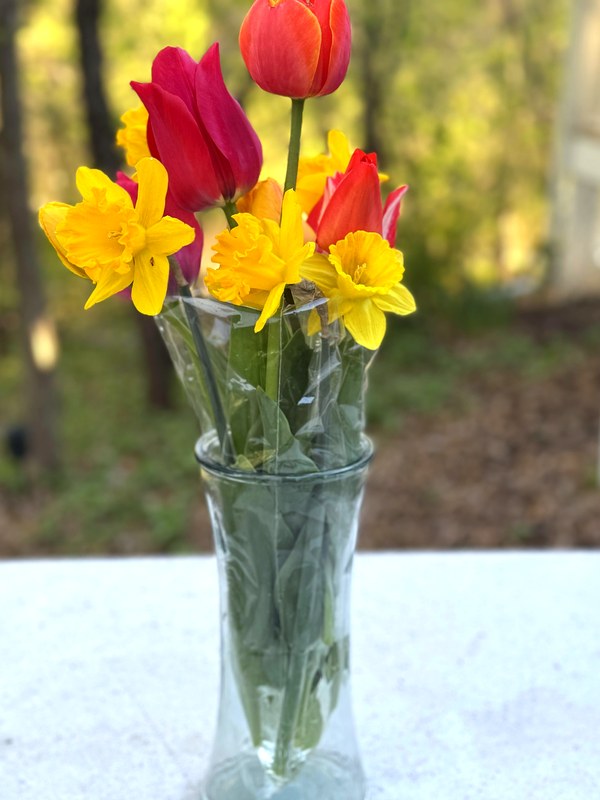
If deer are a problem in your area, know that tulips are unfortunately one of their favorite snacks. Daffodils, on the other hand, are toxic to deer and make excellent companion plantings. Interplanting tulips with daffodils can help deter browsing, and the combination of yellow daffodils with colorful tulips creates a stunning spring display.
The Joy of Growing Your Own
There is a deep satisfaction that comes from growing tulips yourself. Watching those first shoots break through the mulch on a chilly April morning, seeing the buds swell and color over the course of a week, and then finally cutting an armful of your own blooms to bring inside — these are moments that connect you to the rhythm of the seasons in a way that nothing else quite can.
Tulips reward patience. You plant in the fall, wait through the long winter, and trust that beneath the frozen ground, something beautiful is quietly preparing to emerge. When it finally does, the wait makes the color all the more vivid and the fragrance all the more sweet. Whether you plant a dozen bulbs in a container on your patio or a thousand across your backyard, the experience is the same: pure, uncomplicated joy.
Love peonies too? Learn how to grow peonies in your own garden — or join our presale for fresh-cut peony bunches arriving late May.
Read: Growing Peonies